编译内核
这里假定读者已经拥有一个宿主 GNU/Linux 发行版作为宿主系统
您可以前往VMware官网下载其最新版
VMware Workstation 和 Fusion 对个人使用完全免费,企业许可转向订阅,可以前往链接下载对应版本
VMware Fusion Pro 13.0.0 最新序列号Fusion简介 VMware Fusion是最好的Wind:
MC60H-DWHD5-H80U9-6V85M-8280D/
- Ubuntu release iso: tuna mirrors
- Centos release iso: aliyun mirrors
编译内核
The Linux Kernel Archives 提供了所有Linux内核的历史版本,你可以使用git下载一个巨大的仓库,但笔者建议使用HTTP协议选择一个Linux版本使用即可
以6.6版本Linux内核源代码为例,可以在 Linux Kernel 找到v6.x版本,搜索6.6.gz 即可
本文以6.6为例,您可以使用wget下载
wget https://mirrors.edge.kernel.org/pub/linux/kernel/v6.x/linux-6.6.tar.gz
tar xf linux-6.6.tar.gz
cd linux-6.6
本仓库代码也基于 v6.6 的源码,读者可以直接 clone 本仓库亦或者下载 linux 6.6 源码,所有 patch 和 modules 都可以无冲突直接应用。
使用 v6.6 版本的内核有如下的几个原因,本文希望参考的是一个较为稳定且现代化的操作系统内核,开始学习内核时 Linux 最新的 LTS kernel releases 为 6.6。内核的代码仍在不断演进,并逐步加入一些新功能,完善旧代码等等。本系列作为一篇学习笔记类的文章不可能紧跟内核最新动态。好在大部分基础内核代码都是比较稳定的,6 之后的不同版本之间应该不会有显著差异
安装依赖
配合编译需要的软件程序很多,而且特定版本的内核也可能需要特定版本的软件,新的编译器版本也可能会带来一系列问题
另外安装软件的时候也很可能会出现依赖冲突等等问题,内核编译的时候也会因为各种配置带来各种问题的报错,解决起来相当之麻烦,尤其是老版本内核...
如果实在解决不了,建议换新一点的 Ubuntu 的版本,换源,换 Linux 版本
sudo apt update
sudo apt-get install git fakeroot build-essential ncurses-dev xz-utils libssl-dev bc flex libelf-dev bison vim dwarves
内核编译配置
内核本身的可选的功能模块众多,并不能直接通过 make 编译,需要首先创建一个配置文件 .config 用于控制开启/关闭哪些内核功能
make menuconfigmenuconfig 会在当前终端窗口中开启界面调整内核配置,默认会复制当前正在使用的内核的 config 文件(
/boot/config-$(uname -r))作为本次编译的配置文件该界面有一个比较方便的搜索功能,输入
/进入一个搜索页面,可以在里面搜索关键字找到对应的配置位置。例如搜索 GDB 可以得到如下的一些结果,根据结果中 Location 的信息找到对应的配置位置,再进行修改。这里按下 4 就可以直接跳转到这个选项所在的位置来进行修改
或者对于一些配置选项比如 CONFIG_VIRTIO_PCI 可以直接搜索找到相关的选项并打开,不建议直接改动 .config 文件因为可能 CONFIG 选项之间有关联关系,最好在 menuconfig 中修改
修改编译配置
需要做一些修改以便后面的调试
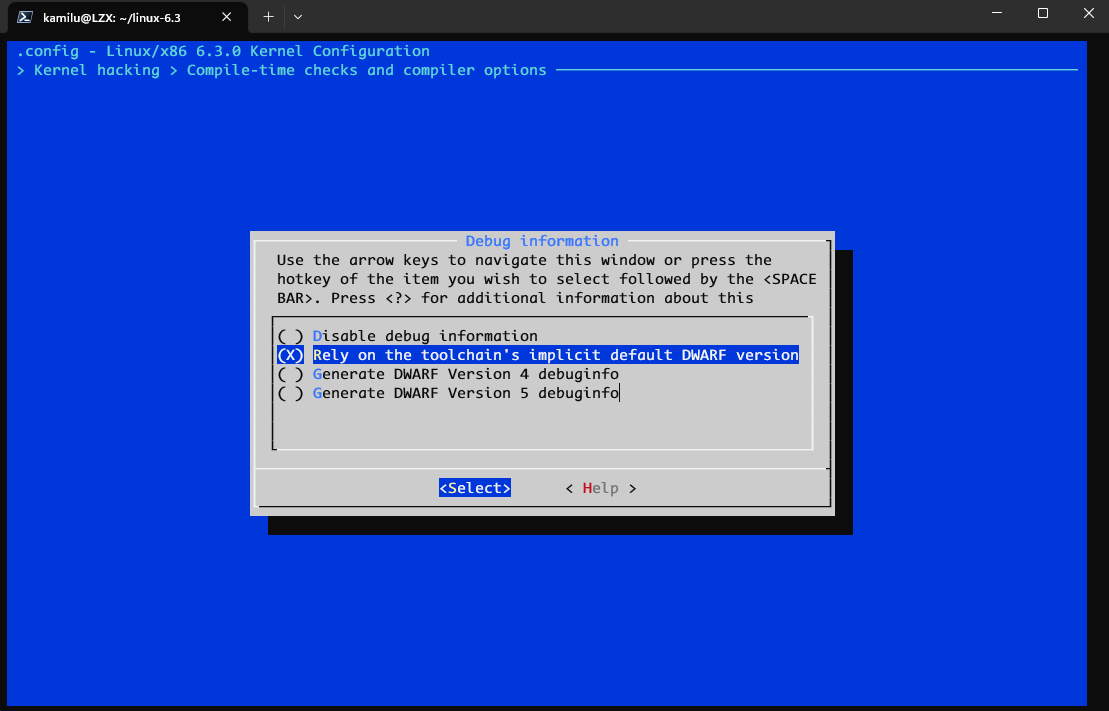
- 添加调试信息
Kernel hacking  --->
    Compile-time checks and compiler options  --->
        [*] Compile the kernel with debug info
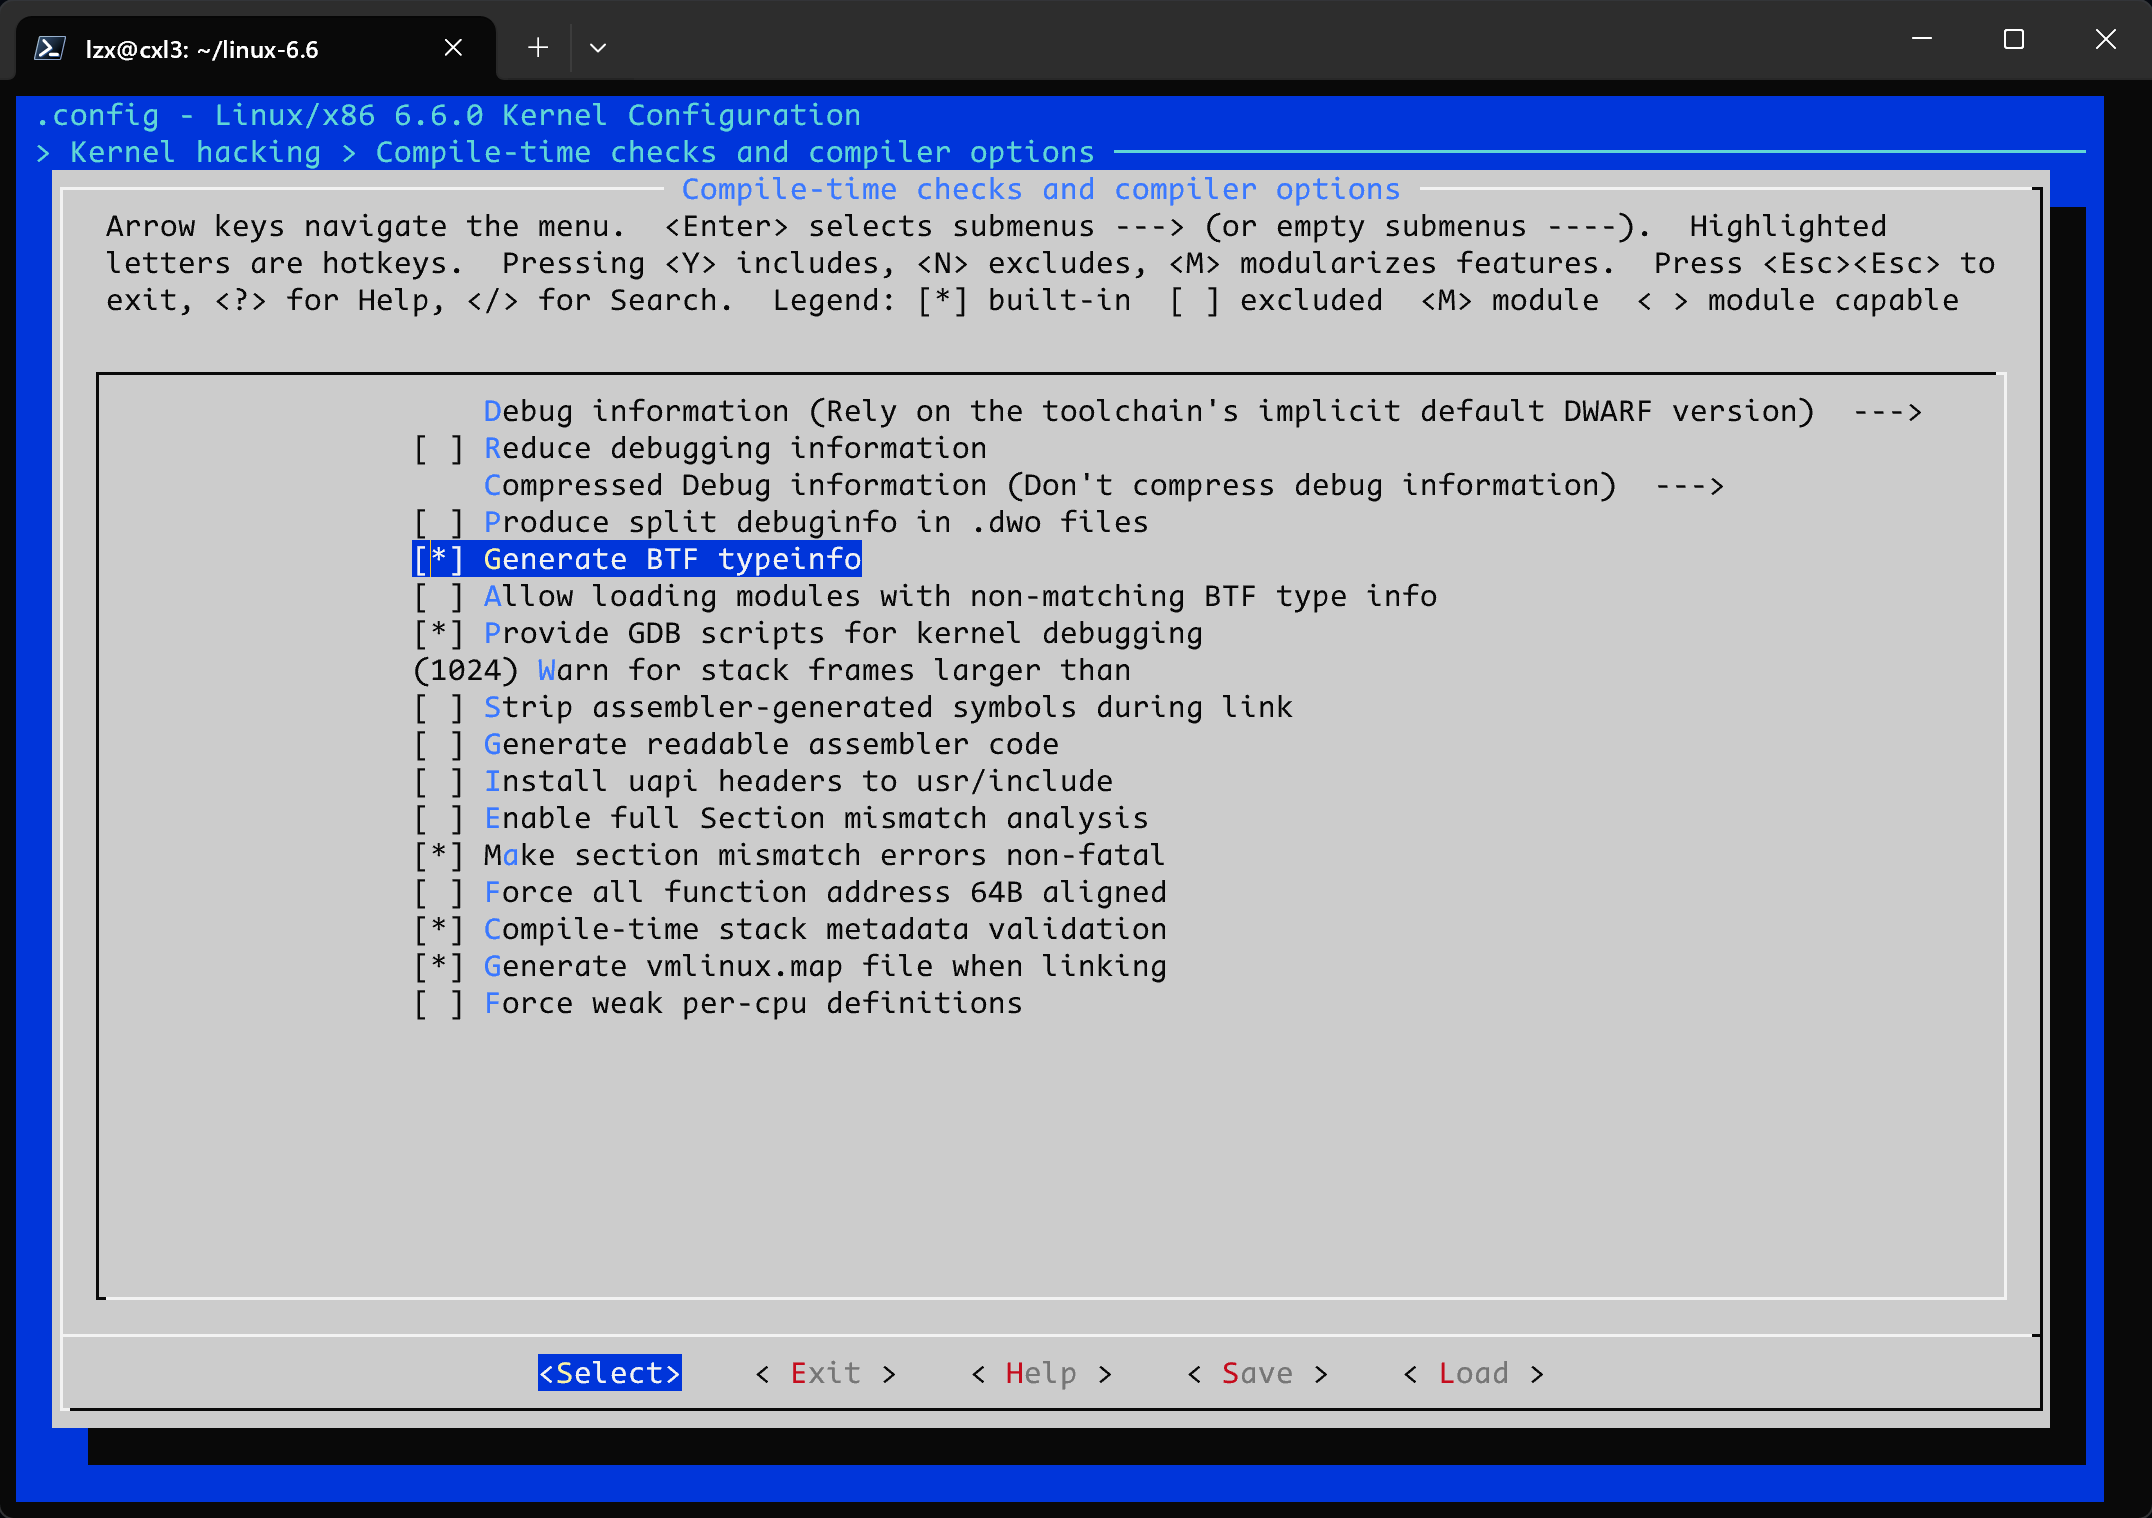
        [*]   Generate BTF typeinfo
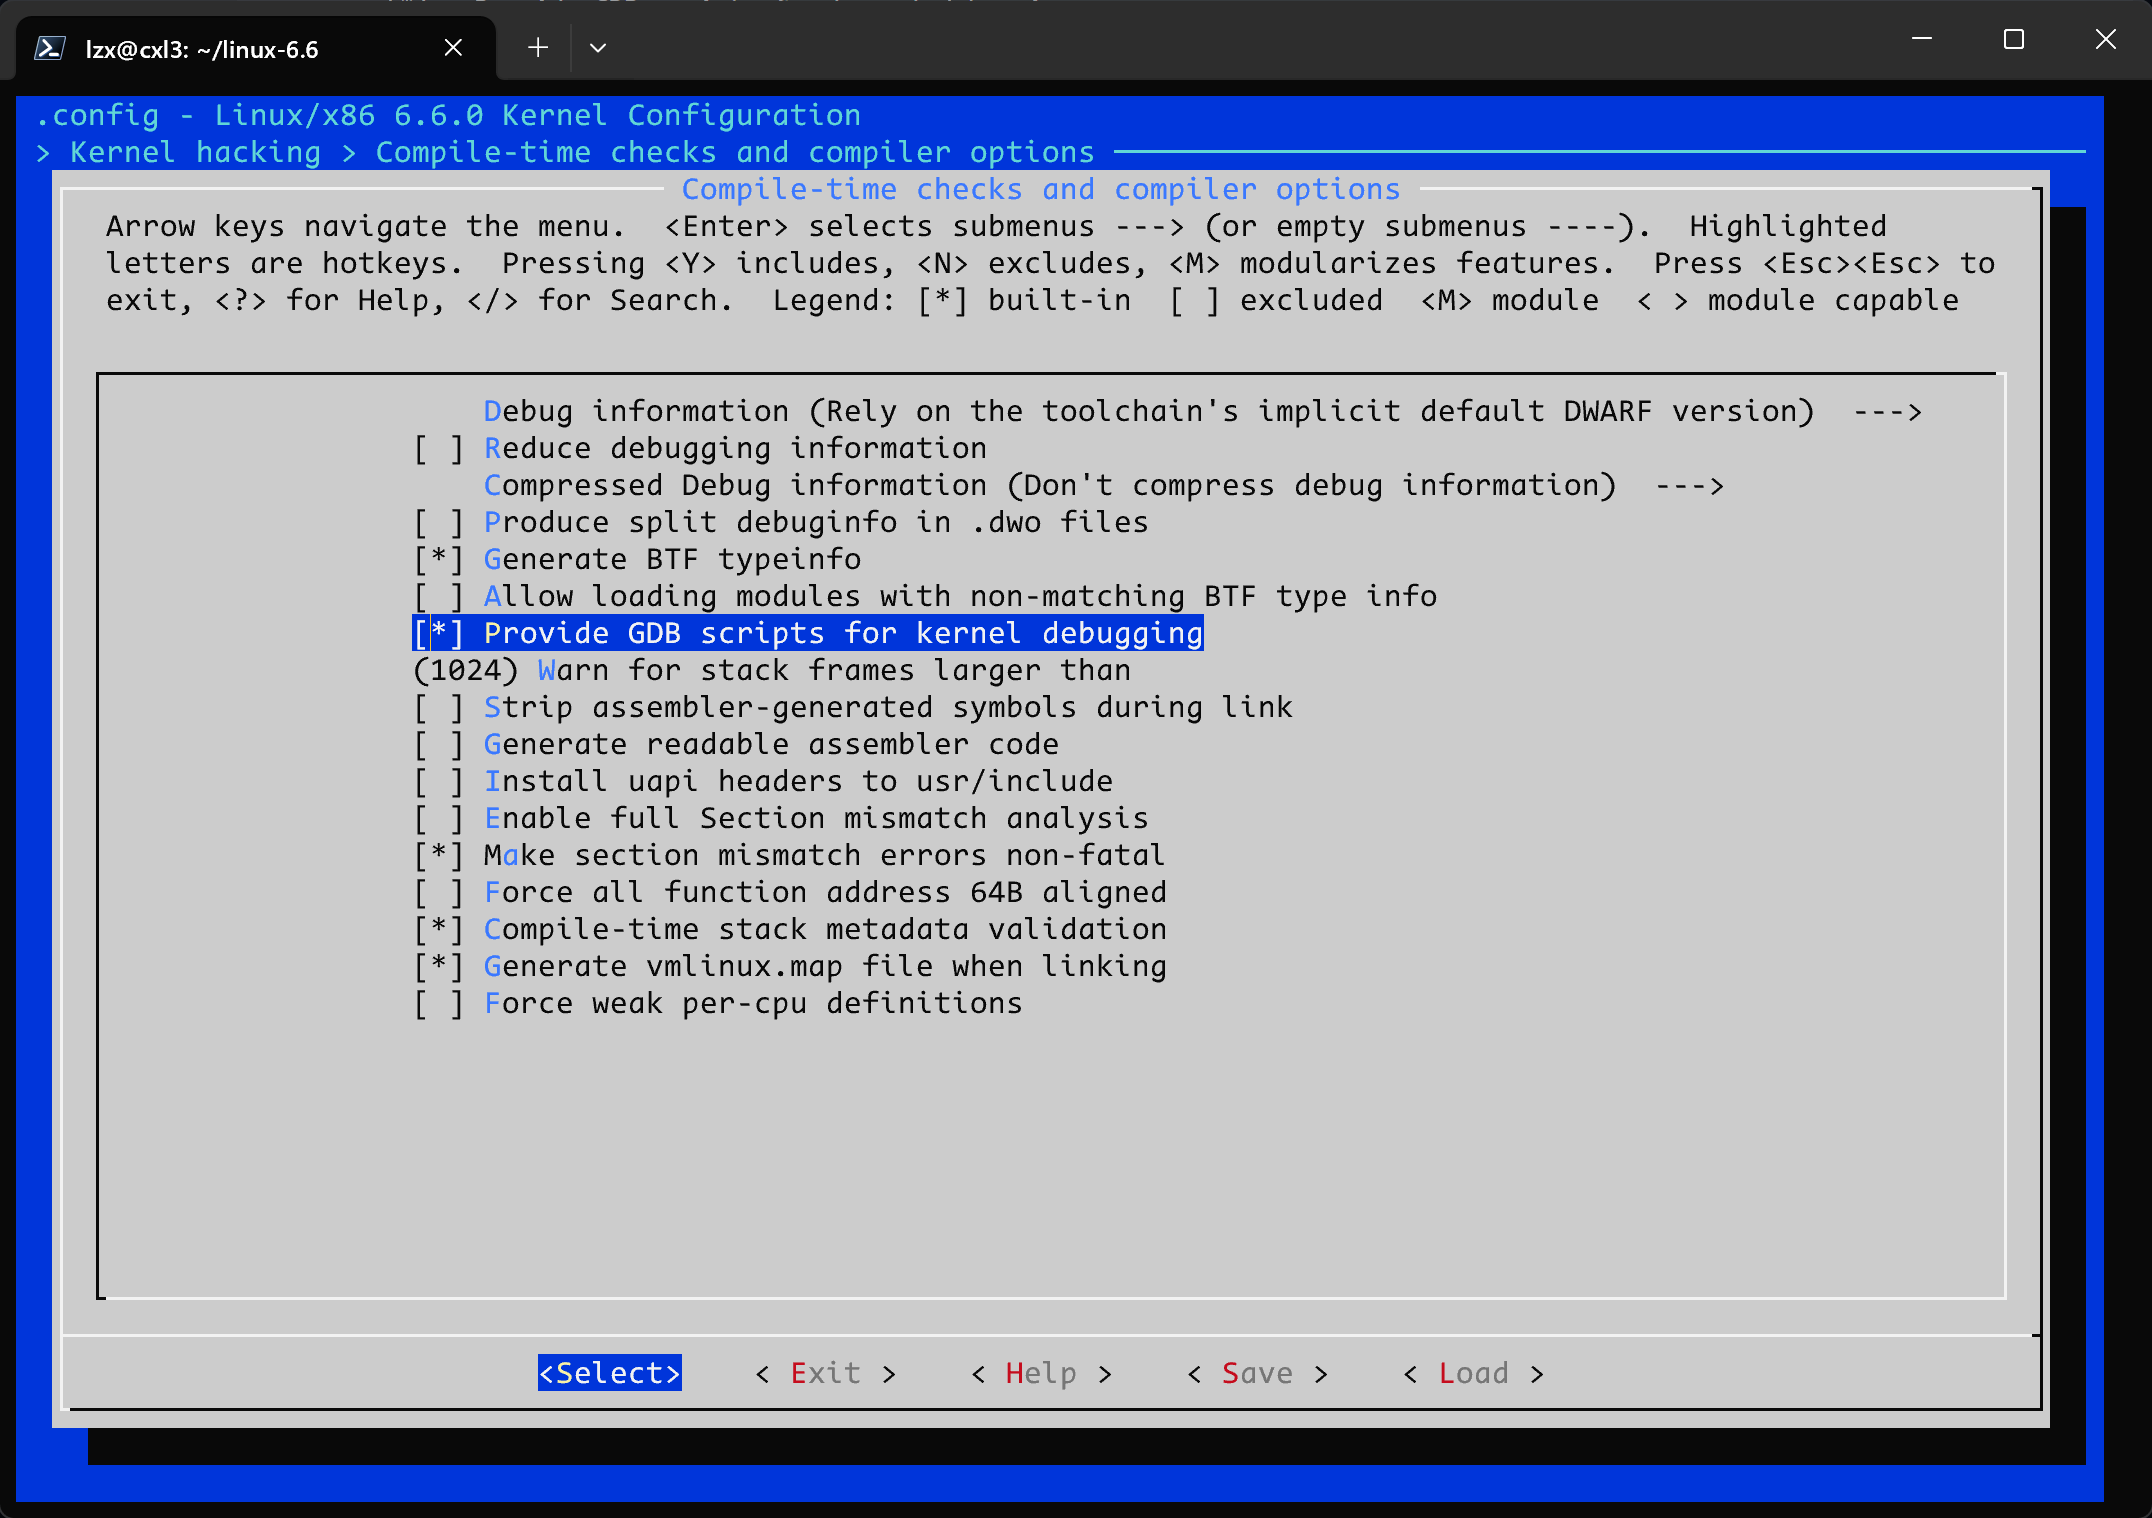
        [*]   Provide GDB scripts for kernel debugging
    [*] Kernel debugging
这里的 debug info 在 Linux 6.6 中默认应该是没有开启的,选第二个
然后再退出来就可以看到这个
Provide GDB scripts for kernel debugging选项了,使用空格选中同时这一页上面还有一个
Generate BTF typeinfo也勾选, eBPF 需要此功能(如果不使用BPF可以不勾选,笔者建议勾选)
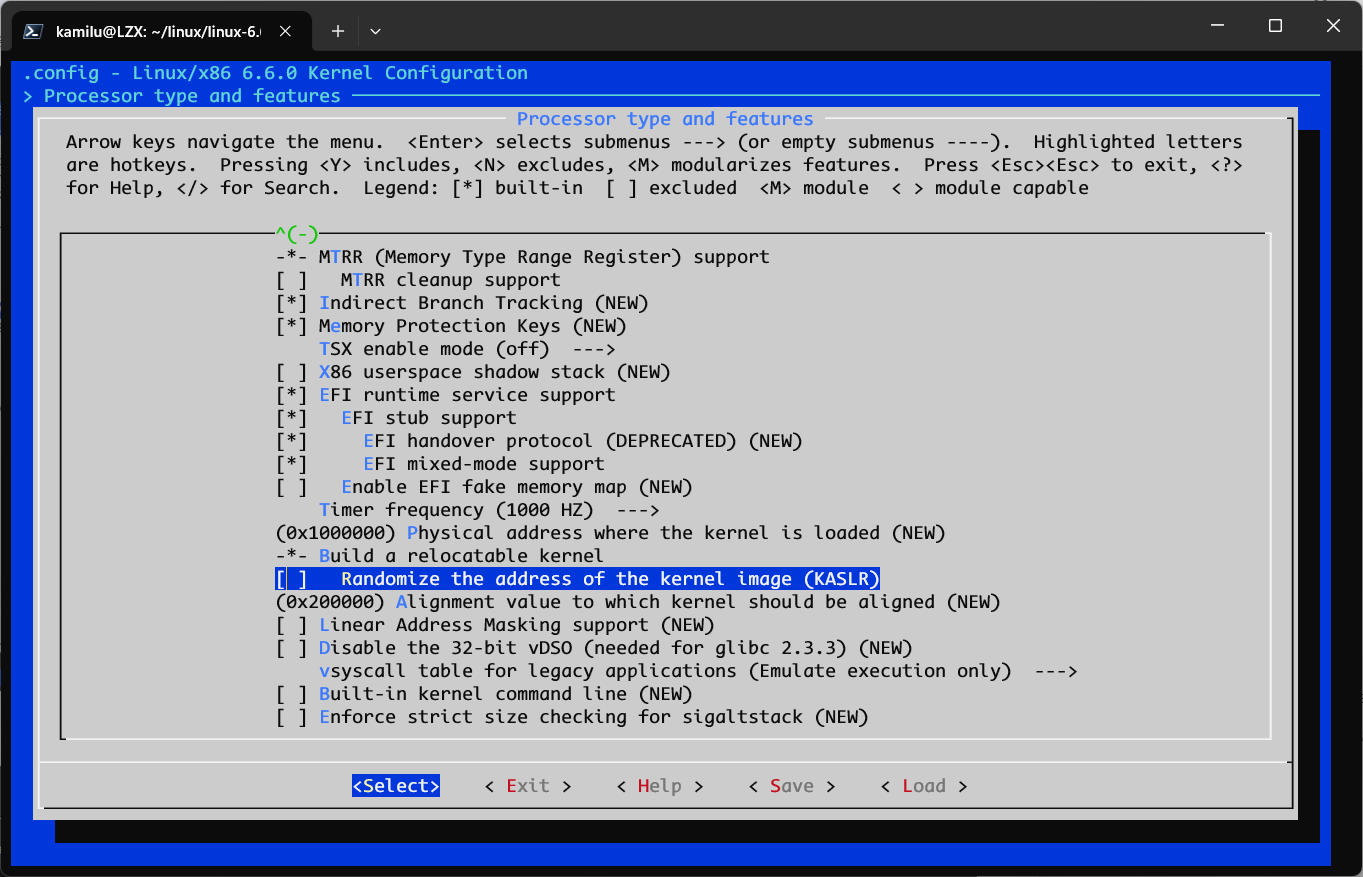
- 禁用随机地址,KASLR 用于保护内核地址防止被攻击,为了方便调试代码我们找到对应位置取消勾选,如果不禁用随机地址 gdb 调试时没有办法准确定位
Processor type and features
    [*] Build a relocatable kernel
    [ ]   Randomize the address of the kernel image
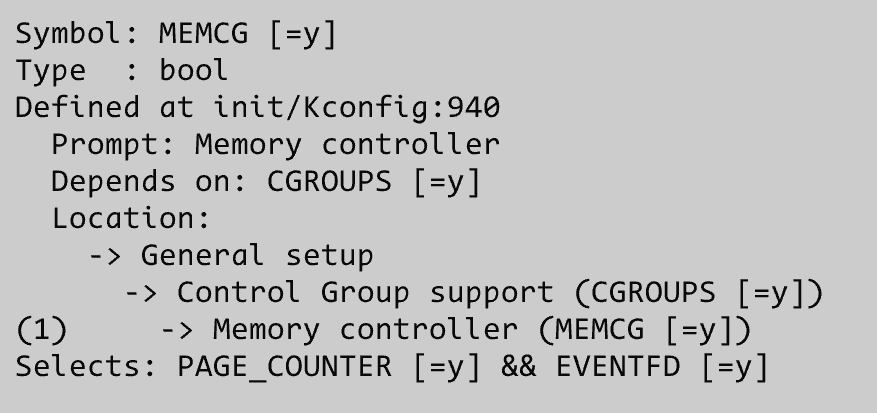
- 开启内存控制器,(搜索
MEMCG)General setup ---> [*] Control Group support ---> [CGROUPS] [*] Memory controller [MEMCG]
如果后期修改了内核编译出来的内核版本号带有dirty后缀,这是编译内核的时候自动添加的。可以通过如下选项关闭
General setup  --->
    [ ] Automatically append version information to the version string
修改完成之后选择 save 保存退出即可,得到 .config 配置文件
TIP
这里只介绍了较为精简内核调试配置,后文介绍到对应章节时还需要开启对应的 CONFIG,需要重新在 menuconfig 中找到配置项然后修改后重新编译,不再赘述
编译
make -j`nproc`-j`nproc` 表示使用所有可用的 CPU 核心并行编译项目,对于 linux 这种大型项目来说很重要
默认编译的内核同宿主机处理器架构,如果要编译一个其他架构的内核(比如说 i386),可以使用
ARCH指定make -j`nproc` ARCH=i386
编译时间不确定,短则几分钟,长则十几几十分钟,取决于电脑 cpu 和内存性能
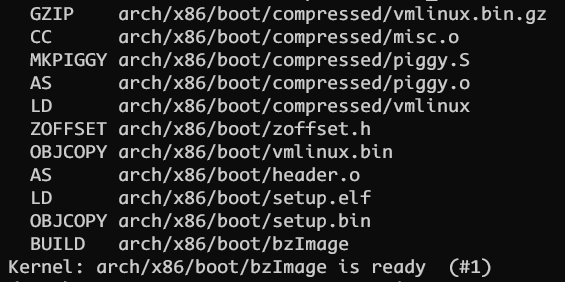
编译完成可以得到 vmlinux 和 arch/x86/boot/bzImage
NOTE
vmlinux和bzImage都是Linux内核编译生成的文件,它们的主要区别在于它们的文件格式和用途。
- vmlinux 是Linux内核编译生成的未压缩的内核镜像文件
- 它是一个 ELF 文件,包含了整个内核的代码和数据,主要用来调试内核.
- 并不是“裸机镜像”,不能直接被 BIOS/UEFI/QEMU 当作可启动映像加载
- bzImage 是通过 make bzImage 从 vmlinux 包装生成的一个压缩过的可引导内核镜像
- 它是用来引导启动Linux操作系统的
- bzImage 将vmlinux压缩成一个单独的文件,并添加一些引导代码和头部信息
- 它可以直接被 BIOS/UEFI 或 QEMU 识别、加载并执行
当系统引导时,bzImage首先会被加载到内存中,然后被解压缩成vmlinux形式的内核映像.因为vmlinux文件比较大,而且内核启动过程中需要加载和解压缩文件,所以bzImage文件通常比vmlinux文件小很多。
简而言之,vmlinux主要用于内核开发和调试,而bzImage用于实际的Linux操作系统启动。更多内容详见内核镜像格式 和 Linux boot protocol
如果编译出错了那么可以执行如下命令清除重试
sudo make mrproper
sudo make distclean
如果仅对于 qemu 调试学习来说到编译得到 vmlinux 这一步已经可以了,如果希望在真实物理机器上切换使用新内核请参考安装内核与救火
可能遇到的问题
当然,编译过程并不都是一帆风顺的,遇到错误在所难免。下面是笔者遇到的一些错误和解决措施,读者可以修改后重新执行上述 make 编译
- trusted key
将 .config 中的 CONFIG_SYSTEM_TRUSTED_KEY 改为 ""
或者直接执行如下命令,效果相同
scripts/config --disable SYSTEM_TRUSTED_KEYS- unknown type name 'Elf64_Xword'
不要在 .bashrc 中改 CPATH,可能是因为与其他软件(比如QEMU)源代码中的符号冲突了
- Failed to generate BTF for vmlinux
BTF: .tmp_vmlinux.btf: pahole (pahole) is not available
Failed to generate BTF for vmlinu
Try to disable CONFIG_DEBUG_INFO_BTF
make[2]: *** [scripts/Makefile.vmlinux:36: vmlinux] Error 1
BTF 主要用于内核 ebpf 功能,解决这个问题有两种方式
如果希望启用 BTF 则安装 pahole(dwarves) 软件包
sudo apt install dwarves如果不使用 BTF 则可以直接把 .config 的 CONFIG_DEBUG_INFO_BTF 注释掉
- _compiletime_assert
./include/linux/compiler.h:350:45: error: call to '__compiletime_assert_653' declared with attribute error: BUILD_BUG_ON failed: (((0x0ffULL) + (1ULL << (__builtin_ffsll(0x0ffULL) - 1))) & (((0x0ffULL) + (1ULL << (__builtin_ffsll(0x0ffULL) - 1))) - 1)) != 0
  350 |         _compiletime_assert(condition,msg,__compiletime_assert_,__LINE__)
linux kernel build compliler assert error
高版本 gcc 编译有 bug,使用 gcc-9
sudo apt install gcc-9手动切换 gcc 版本,选择 gcc-9
sudo update-alternatives --config gcc- arch/x86/entry/thunk_64.o: warning: objtool: missing symbol table
这个问题通常是因为使用较新的软件包编译旧版本的内核,例如编译 5.8.5 内核。但是系统中的 binutils 2.36太新,无法编译
reddit compiling_older_versions_of_the_kernel_using
可以应用此 Patch
From 1d489151e9f9d1647110277ff77282fe4d96d09b Mon Sep 17 00:00:00 2001
From: Josh Poimboeuf <jpoimboe@redhat.com>
Date: Thu,14 Jan 2021 16:14:01 -0600
Subject: [PATCH] objtool: Don't fail on missing symbol table

Thanks to a recent binutils change which doesn't generate unused
symbols,it's now possible for thunk_64.o be completely empty without
CONFIG_PREEMPTION: no text,no data,no symbols.

We could edit the Makefile to only build that file when
CONFIG_PREEMPTION is enabled,but that will likely create confusion
if/when the thunks end up getting used by some other code again.

Just ignore it and move on.

Reported-by: Nathan Chancellor <natechancellor@gmail.com>
Reviewed-by: Nathan Chancellor <natechancellor@gmail.com>
Reviewed-by: Miroslav Benes <mbenes@suse.cz>
Tested-by: Nathan Chancellor <natechancellor@gmail.com>
Link: https://github.com/ClangBuiltLinux/linux/issues/1254
Signed-off-by: Josh Poimboeuf <jpoimboe@redhat.com>
---
 tools/objtool/elf.c | 7 +++++--
 1 file changed,5 insertions(+),2 deletions(-)

diff --git a/tools/objtool/elf.c b/tools/objtool/elf.c
index f9682db33ccabb..d8421e1d06bed3 100644
--- a/tools/objtool/elf.c
+++ b/tools/objtool/elf.c
@@ -380,8 +380,11 @@ static int read_symbols(struct elf *elf)

    symtab = find_section_by_name(elf,".symtab");
    if (!symtab) {
-       WARN("missing symbol table");
-       return -1;
+       /*
+        * A missing symbol table is actually possible if it's an empty
+        * .o file.  This can happen for thunk_64.o.
+        */
+       return 0;
    }

    symtab_shndx = find_section_by_name(elf,".symtab_shndx");
patch -p1 < a.patch其他编译报错问题可以参考

